This page demonstrates all of the available blocks for the Pembroke House website
Your first block
Please start with the Full Website Manual linked to above. Have a good read of that document, as it discusses all the design decisions that have been made. Blocks give you great power to create highly customised layouts. But of course, along with that power comes responsibility. There are only so many design rules that can be hard-coded (Never having an orange footer, for example, to ensure the site maintains its compliance with the Web Content Accessibility Guidelines (WCAG 2.1)). It is therefore up to you to follow the rules laid out in that document and on the three pages hosted on the website.
Remember, you can’t break it. You can always “restore” an older version of a page. If you’re creating a new page, you can publish away before you add the page to a menu. Have fun, and during the initial content population phase be sure to contact The Small Axe with feedback on how it all works so we can implement them now for the future.
Standard content section
Whenever you are adding content, if it isn’t a custom block such as a call to action, you will want to be using the default white background.
This section has been created by adding a separator block immediately below the Hero Welcome (PH) block. This creates the white wavy line.
Heading blocks
The next block (“Standard content section”) is a Heading block, and as it’s not the main heading of the page, we’ve used an H2. The first H2 after a white wavy line will always be the largest font-size, bold and centred.
Subsequent H3s (sub-headings) will be left-aligned and a different font size. Please do not attempt to make them bolder or write them uppercase.
Design rules for headings are hard-coded into the stylesheet, so you can ignore the alignment rules on this block.
Finally, this content has been added using the paragraph block.
Colour
The pullquote below appears on a colourful background. You can set the highlight colour of a page. You can choose from the brand colours Pink, Green or Blue. (The header is always orange. If you don’t set a highlight colour the footer will default to green. You must set a highlight colour as there’s a chance form buttons won’t appear if you don’t.)
At the very bottom of the edit page screen under Page Design you can choose a highlight colour. Quotes, buttons, calls to action and other blocks will make use of the highlight colour:
I am a pullquote block found in the “formatting” section of the block menu
I said the above
A pullquote like the above has a wavy bottom automatically.
Wavy bottoms
In general, the site will take care of wavy lines, but you do need to be aware of the rules and it is your responsibility to ensure they are followed. You can very easily break the rules and therefore break the site.
These are the rules:
- A wavy line indicates the start of a new section of content
- Therefore, a wavy line indicates the end of a section of content
- BUT – wavy lines can be used decoratively with tinted colour blocks (for example quotes or the media / text block)
All custom blocks handle wavy lines themselves.
In the Website Manual document each Reusable block’s handling of wavy lines is documented.
Therefore, the only time you need to think about wavy lines is:
- when you use a separator to create a new content section after a full-width image or video.
A content section is defined as an H2 heading followed by some paragraphs, lists, images, videos, H3 subheadings, and so on.
Unlike the quote block, the media/text block doesn’t have a wavy bottom by default, but you can add one to it decoratively or if you’re ending a section with it by clicking “Advanced” in the right-hand column Block settings panel, and adding “wavy-bottom” (without quotes) to the box “Additional CSS class(es)”:
For the sake of this demonstration we are going to use the media/text block below to end this section and start a new one about images below.
Remember, an H2 that follows a wavy line will always be big and bold and centred. If you wanted the heading below to be a subheading of the current section, make it an H3.
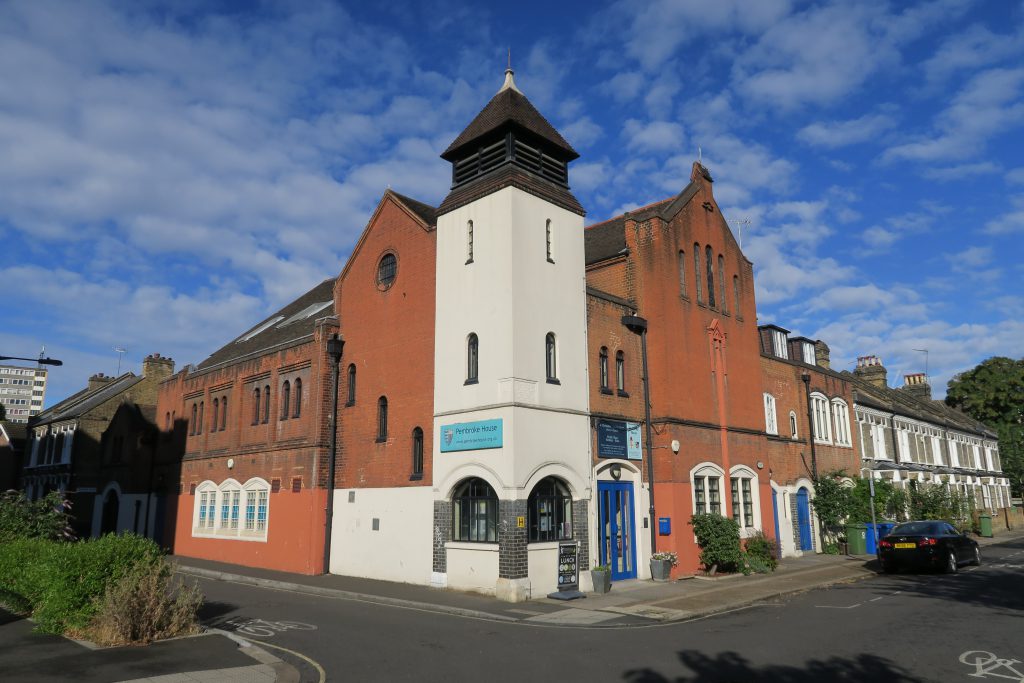
Our beautiful building in Walworth
Images
Images can be added either centred or full-width.
In general you should use a full-width image to end a content section
However, you are free to add an image full-width in the middle of a content section. For this reason full-width images don’t have wavy bottoms by default.
If you wish to start a new section after a full-width image, you need to use a Separator block to ensure a wavy line appears. This will also ensure your subsequent H2 at the beginning of the next content section is the biggest font-size and centre-aligned.
To add an image inline like the below, choose the image block and be sure to choose “align center” in the block’s menu.
In the “Image settings” on the right, make sure you choose “Large”; the theme will ensure your large images are resized correctly and smaller versions are served to people using smart phones:

It is nice to end a content section with a full-width image. You can do this simply using the image block and setting it to full-width.
Whatever size your images, it’s important and required to make the site accessible to always provide an “alt” attribute, but if you want to caption the image (for example to acknowledge copyright) you can do so using the caption field in the Media Library.
Video blocks
Let’s have a play with video. First, note we have a Separator block above this set to full-width. This gives us the wavy line and the space above the heading.
If you wanted no wavy line but the space above the heading (if the topic of the current section was continuing), you could have added the spacer block and not had the wavy line, but in general you shouldn’t need the spacer block. Don’t worry if you do though, there will be sequences of blocks that result in edge cases we just didn’t design for.
The below is the YouTube block with a URL (https://www.youtube.com/watch?v=ThIjLtTC5BE) pasted in and the alignment set to center:
Let’s try the same video in full-width mode.
In general you should only use video centred or in full-width mode. The only exception to this is on Activity Listing, where they should be centred in the blurb column (align left will break the layout).
The wavy lines below are added by the separator block before the next section.
Pembroke House Blocks
There are a number of new blocks that have been created for Pembroke House. These are listed here: http://pembrokehouse.org.uk/wp-admin/edit.php?post_type=block_lab
There is a sub-page of this page that demonstrates all the reusable blocks
Please view the Website Manual google doc for full documentation of these blocks. It also includes information on how these blocks handle wavy lines.
The featured event block has its own documentation page on the website:
Wavy lines
If a block includes a wavy line by default (for example the Get Involved CTA (PH) block below), if you don’t use it after an image or colourful CTA section, the white wavy line is effectively invisible against the white background of the standard content section: